How to nail the audition.
Here are some practical self-tape guidelines as well as a practice Self-Tape & Example Breakdown (in other words, slate & simple self-tape instructions to practice with). Please note that if needed, specific adaptations & accommodations related to your disability are acceptable and encouraged.
To see examples of what a self-tape can look like, please click HERE. You can also learn more about how to slate HERE and HERE.
Of course, these examples are not done by Persons With Disabilities, so as mentioned, often adaptations or accommodations will need to be made depending on one’s access needs.

1 - Camera Orientation

2 - Framing
4 - Eye Line
Your eye line should be directly to the right or to the left of your recording device’s lens, which should be placed directly in front of you, as explained above in ‘2 - Framing’ and ‘3 - Camera Angle’. Do NOT deliver your lines into camera.
5 - Tripod
Your recording device should be stationary and NOT handheld. If you do not own a tripod, mount, or stand for your device, create a secure location for your device to sit using household items such as books, etc.
6 - Background
If possible, please record your self-tape in front of an uninterrupted, solid-coloured wall or backdrop.

3 - Camera Angle
Your recording device (whether it is a smartphone, computer, or videocamera) should be positioned at eye level, so that you’re not looking up to your camera (image 1) or down at your camera (image 2). It should also not be positioned too far to the left or right of you (image 3).

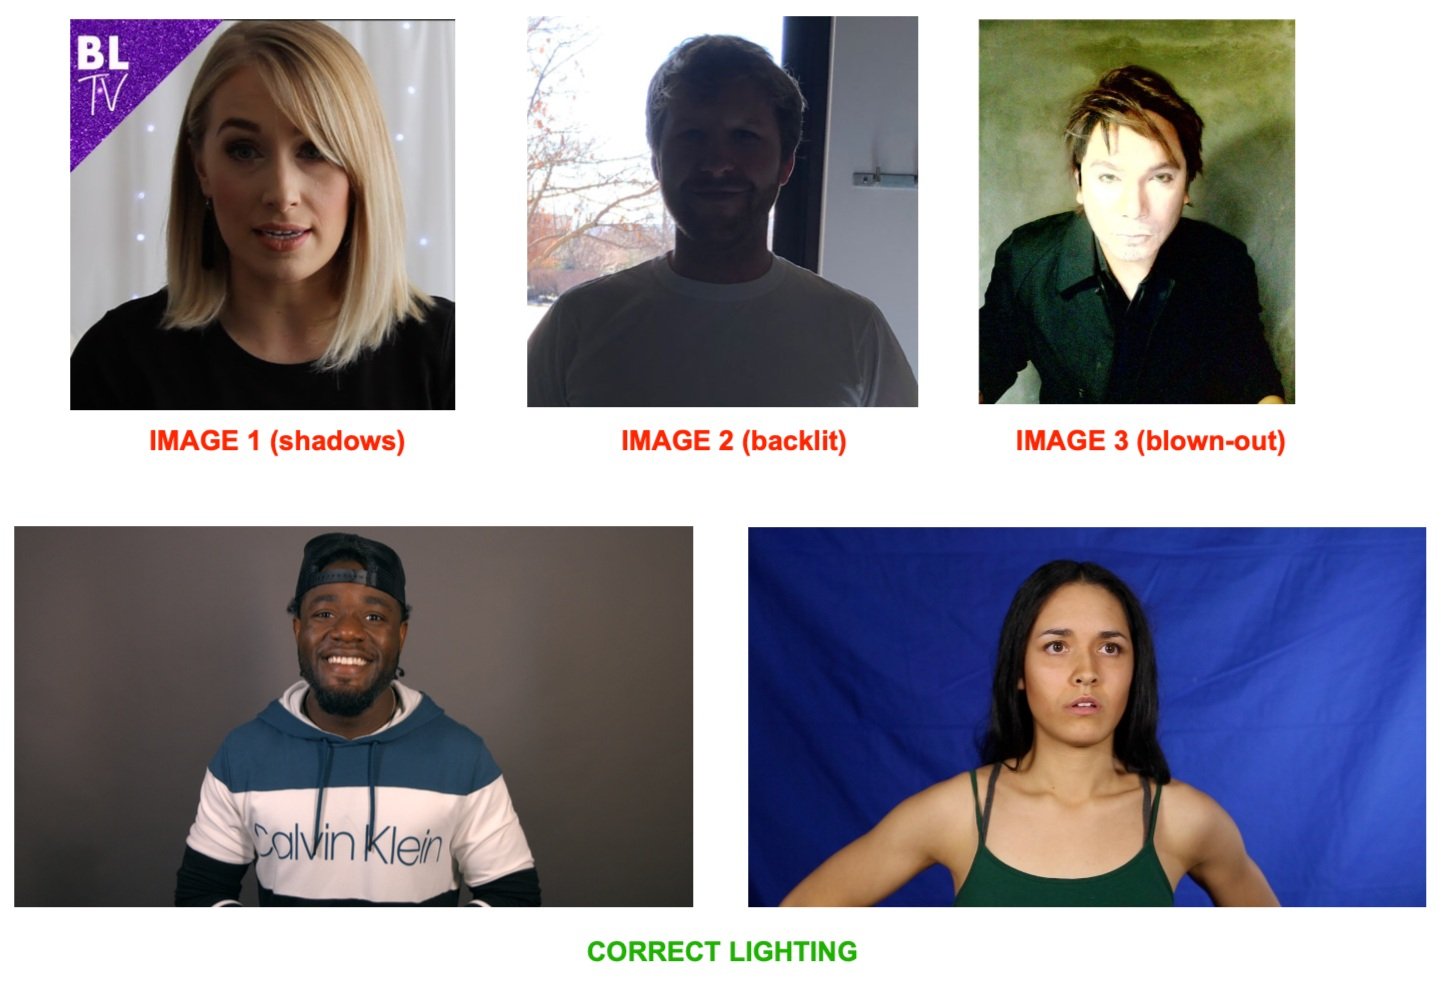
7 - Lighting
Do your best to avoid shadows (image 1). Do not tape standing in front of a window as you will be backlit and appear in silhouette (image 2). Do not ‘blow yourself out’ by over-lighting your face (image 3).